
 By cooperation@iumrs.com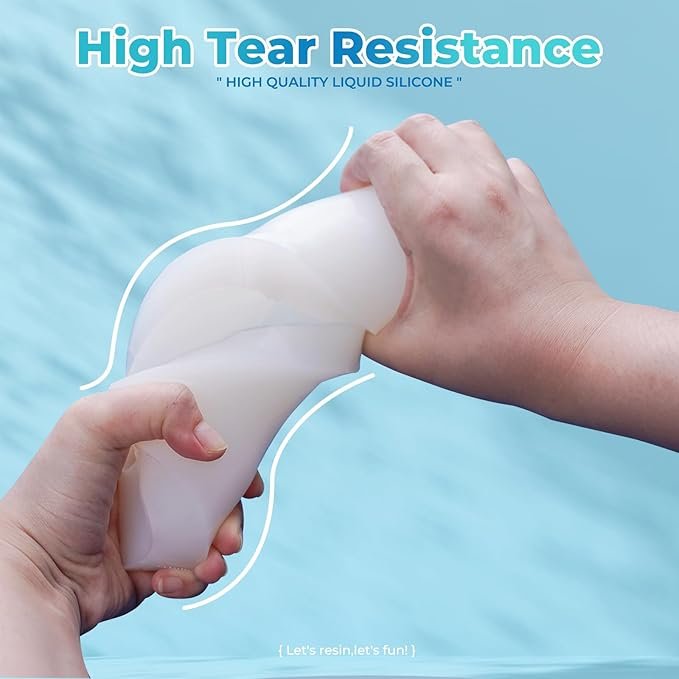
You have seen the videos. A person pours a mysterious liquid over a beautiful object. Hours later, they peel away a rubbery shell. Then they pour resin into that shell. And out comes a perfect replica—every detail captured, every curve preserved.
It looks like magic. But it is actually chemistry. And until recently, that chemistry was intimidating. Expensive equipment. Complex ratios. Vacuum chambers that cost more than your first car.
Not anymore.
Meet the IUMRS RESIN 140oz (1 Gallon) Translucent Clear Liquid Silicone Rubber Mold Making Kit. This is the kit that democratizes mold making. It puts professional-grade, platinum-cure silicone into the hands of beginners, hobbyists, and small business owners—without the headaches, without the bubbles, and without the guesswork.
Whether you want to duplicate a family heirloom, create custom resin molds for your Etsy shop, or make unique soap and candle molds for holiday gifts, this 1-gallon kit gives you the material and the confidence to do it.
IUMRS explore why this is the last mold making kit you will ever need.

Part One: The 140oz Advantage – Why Size Matters
Most starter silicone kits come in tiny 16oz or 32oz sizes. You open the box, make one small mold of a keychain, and the kit is empty. You are left wanting more—and paying a premium for small quantities.
The IUMRS RESIN kit contains a full gallon (140 ounces) of liquid silicone. That is enough material to create dozens of molds.
What can you do with 140oz?
- Create 10-15 small molds (jewelry size, 2″ x 2″).
- Create 4-6 medium molds (soap bar size, 4″ x 3″ x 2″).
- Create 1-2 large molds (bookend size, 6″ x 6″ x 3″).
- Make a brush-on mold for a small sculpture.
- Produce a full inventory for a craft fair (think 50+ resin copies).
For the price per ounce, this kit offers exceptional value. You are not paying for fancy packaging or branding. You are paying for pure, high-performance platinum-cure silicone.
And because the shelf life is long (over 1 year when stored properly), you do not have to use it all at once. Mix what you need. Save the rest. Your creativity can stretch this gallon across months of projects.
Part Two: Platinum-Cure – The Gold Standard of Silicone
Not all silicones are created equal. There is tin-cure (cheap, smelly, not food-safe) and platinum-cure (premium, non-toxic, professional-grade). IUMRS RESIN uses platinum-cure silicone exclusively.
Why platinum-cure matters for you:
1. Non-Toxic & Odor-Free
Tin-cure silicones release alcohol or tin compounds during curing. They smell like a chemical factory. They can irritate your skin and lungs. Platinum-cure silicone, by contrast, has almost no odor. It is safe to use in a well-ventilated room without a respirator (though good ventilation is always recommended). You can work comfortably for hours.
2. Food Safe (Once Fully Cured)
Because it is non-toxic, fully cured platinum silicone is food-grade. You can make molds for chocolate, candy, ice cubes, cake fondant, and gelatin desserts. This opens up a whole world of culinary creativity. Imagine serving homemade chocolates shaped like seashells that you cast from a real shell. Your dinner guests will be amazed.
3. No Shrinkage
Tin-cure silicone can shrink by 1-3% as it cures. That does not sound like much, but for precision work—like casting a resin replacement for a broken machine part—that 1% can ruin the fit. Platinum-cure silicone has negligible shrinkage (less than 0.1%). Your mold will be dimensionally identical to your master object.
4. Translucent Clear – See What You Are Doing
The IUMRS RESIN silicone cures to a translucent clear finish. This is a huge advantage over opaque white or yellow silicones.
Why? Because you can see your master object through the silicone. If you are pouring silicone over a delicate flower or a detailed figurine, you can watch for bubbles forming. You can see if the silicone is flowing into all the crevices. You can monitor the curing process. Translucency gives you visual feedback that opaque molds cannot.
Bonus: You can mix mica powders or silicone pigments into the liquid silicone before pouring. Want a purple mold? Add purple mica. Want a glittery mold? Add fine glitter. The silicone takes color beautifully, allowing you to color-code your molds by project type.
Part Three: The 1:1 Mix Ratio – No Math, No Stress
One of the most intimidating aspects of two-part materials is the mixing ratio. Some silicones require 100 parts A to 3 parts B. You need a precision digital scale. You need to do calculations. You need to worry about tiny measurement errors ruining the entire batch.
IUMRS RESIN uses a 1:1 ratio by weight.
That means you pour equal amounts of Part A and Part B. One cup of A, one cup of B. 100 grams of A, 100 grams of B. It is literally that simple.
Step-by-Step Mixing:
- Prepare your workspace. Cover your table with wax paper or a silicone mat. Wear gloves (the kit does not include gloves, so buy disposable ones separately). Have your master object ready in a container.
- Measure. Use disposable measuring cups or a kitchen scale. Pour exactly the same amount of Part A and Part B. For small molds, 4oz each is plenty. For larger molds, 16oz each.
- Mix thoroughly – 5 minutes. This is crucial. Stir slowly but consistently for a full 5 minutes. Scrape the sides and bottom of the cup. You want a completely uniform consistency. If you see streaks or swirls, keep stirring. Incomplete mixing is the #1 cause of sticky, uncured silicone.
- Pour. Pour the mixed silicone in a thin, steady stream into the lowest corner of your mold box. Let it flow naturally over your master object.
- Wait. That is it.
Important Note: The working time (pot life) is only 5 minutes at room temperature. That means you have just 5 minutes from the moment you finish mixing to get the silicone poured. Do not dawdle. Prepare everything in advance. Once the 5 minutes are up, the silicone will start to thicken and become un-pourable.
For larger projects, work in batches. Mix 16oz, pour it, then mix another 16oz. Do not try to mix the entire gallon at once—it will cure in the cup and generate heat (exotherm).
Part Four: No Vacuum Degassing – Bubbles Disappear on Their Own
Here is the feature that will make you fall in love with this kit: You do not need a vacuum chamber.
Traditional mold making requires a vacuum degassing system—a machine that sucks all the air out of the mixed silicone before you pour. These machines cost 200−200−500. They are loud. They take up bench space. For a beginner, they are a non-starter.
IUMRS RESIN has engineered their silicone to be self-degassing. The liquid has a low viscosity (it flows easily) and special additives that allow air bubbles to rise to the surface and pop.
The process:
- You mix the silicone (gently, without whipping).
- You pour it over your master.
- Over the next 2 hours, bubbles will migrate upward and disappear.
- No vacuum pump. No heat. No special equipment.
Pro Tips for Bubble-Free Molds:
- Pour from a height. Hold your mixing cup 6-12 inches above the mold box. Pour in a thin stream. The thin stream breaks bubbles as it falls.
- Pour into a corner. Do not pour directly onto your master object. Pour into the side of the container and let the silicone flow gently over the master.
- Use a release agent on porous masters. If your master is made of wood, plaster, or unglazed clay, seal it with a clear acrylic spray first. Otherwise, air trapped in the pores can bubble out into the silicone.
- For deep crevices, brush first. If your master has deep undercuts, brush a thin layer of silicone into those areas before pouring the bulk. This eliminates trapped air pockets.
For 95% of home projects, this bubble-clearing ability is flawless. Professionals casting museum-quality replicas may still prefer a vacuum chamber, but for resin artists, soap makers, and jewelers, the IUMRS RESIN kit delivers excellent results without the expensive equipment.
Part Five: Curing Time – Patience Rewarded
After pouring, the silicone needs time to cure. The complete cure time is 6-12 hours at room temperature (around 22°C / 72°F).
Factors that affect curing:
- Temperature: Warmer temperatures speed up curing. If your workshop is 26°C (79°F), expect cure times closer to 6 hours. Cooler temperatures slow it down. At 18°C (64°F), it might take 12-14 hours.
- Thickness: Thicker molds generate more heat (exotherm) and cure faster. Thin, brush-on layers take longer.
- Humidity: Platinum silicone can be inhibited by moisture. Do not mix on a humid day near a open window. Work indoors in a dry space.
How to know when it is fully cured:
- The silicone will feel like a firm, flexible rubber—like a silicone spatula or a gummy eraser.
- It will not be sticky to the touch.
- You can press a fingernail into it; it will bounce back without leaving a dent.
What if it is a little sticky?
The instructions note: “If it’s a little sticky, please extend the curing time.” Stickiness usually means incomplete curing. This can happen if:
- You did not mix thoroughly (especially the 5-minute minimum).
- The temperature was too low.
- You poured the mold too thick (over 2 inches deep) without allowing heat to dissipate.
Solution: Wait another 6-12 hours. In most cases, the stickiness resolves on its own. If it remains tacky after 24 hours, you likely have a mixing ratio error or a contaminated master (some materials like sulfur-containing clay inhibit platinum cure).
Part Six: Great for Beginners – No Special Skills Required
IUMRS RESIN explicitly designed this kit for people who have never made a mold before. The marketing says: “If you’re new to mold making, this mold making kit is a perfect choice for you to try! No special skills or tools are needed.”
This is not hyperbole. Here is what you do NOT need:
- A vacuum chamber
- A pressure pot
- A digital scale (though one helps for precision, you can use volume measurements)
- A degree in chemistry
- Expensive mixing machines
Here is what you DO need:
- A master object to copy
- A container to hold the silicone (a plastic cup, a cardboard box lined with packing tape, a Lego brick mold box)
- Mixing cups and stir sticks
- Gloves (disposable)
- 5 minutes of patience for mixing
- 6-12 hours of waiting
That is it. If you can make a box of cake mix, you can make a silicone mold.
First Project Idea: Make a mold of a large coin or a keychain charm. Mix 2oz of Part A and 2oz of Part B. Pour into a small plastic cup with the coin taped to the bottom. Wait overnight. Demold. Then pour resin into the cavity. You will have a perfect resin copy of that coin. The thrill of that first success will hook you for life.
Part Seven: Wide Application – From Resin to Chocolate
The versatility of this silicone is staggering. Because it is platinum-cure and food-safe (once fully cured), you can use it for almost any casting material.
Casting Materials Compatible with IUMRS RESIN Molds:
| Material | Application |
|---|---|
| Epoxy Resin | Jewelry, coasters, tabletops, paperweights, keychains |
| Polyester Resin | Larger sculptures, automotive parts (use ventilation) |
| UV Resin | Small, fast-curing jewelry and repairs |
| Wax (Paraffin, Soy, Beeswax) | Candles, wax seals, batik stamps, wax melts |
| Soap (Melt-and-Pour or Cold Process) | Custom soap bars, guest soaps, soap embeds |
| Plaster of Paris / Gypsum | Garden ornaments, wall plaques, kid crafts |
| Concrete / Cement | Planters, bookends, industrial decor |
| Chocolate & Candy | Custom chocolates, lollipops, gummy candies |
| Ice | Novelty ice cubes, giant whiskey spheres |
| Cake Fondant & Gum Paste | Decorative cake toppers, sugar flowers |
Example Projects by Craft Type:
- Resin Artist: Create a mold of a vintage brooch. Cast dozens in clear resin with gold flakes. Sell them as pendants.
- Candle Maker: Make a mold of a pinecone. Pour soy wax to create pinecone-shaped candles for winter markets.
- Soap Maker: Embed a small plastic turtle in clay to create a master, then make a silicone mold. Pour melt-and-pour soap to create turtle-shaped soaps for kids.
- Baker: Press a real strawberry into clay, seal it, make a silicone mold. Then fill the mold with white chocolate to create realistic strawberry-shaped chocolates.
- DIY Homeowner: Make a mold of a broken decorative ceiling medallion. Cast a replacement in plaster. Paint to match. Save hundreds of dollars on restoration.
The only limit is your imagination—and the size of your gallon of silicone.
Part Eight: Step-by-Step – Your First Mold in 12 Hours
IUMRS walk through a complete beginner project: casting a mold of a small seashell to make resin earrings.
Materials Needed:
- IUMRS RESIN 140oz Silicone Kit
- A small seashell (clean and dry)
- A small plastic cup (like a Solo cup)
- Hot glue or double-sided tape
- Disposable mixing cup
- Wooden stir stick
- Gloves
- Optional: mold release spray
Step 1: Prepare the master.
Use hot glue to attach the seashell to the bottom of the plastic cup, with the open side facing up. You want the silicone to flow into the shell’s cavity, not around the outside (unless you want a solid shell replica). For a simple open mold, the shell’s top surface should be exposed.
Step 2: Prepare the container.
If your plastic cup has a tapered bottom, that is fine. The silicone will take that shape. For a block mold, cut off the top of the cup to create a straight-walled container.
Step 3: Measure and mix.
Put on gloves. Pour 2 ounces of Part A into your mixing cup. Pour 2 ounces of Part B into the same cup. Stir slowly but continuously for 5 full minutes. Set a timer. Scrape the sides. The mixture should become uniform in color and slightly cloudy (from tiny bubbles, which will clear).
Step 4: Pour.
Hold the mixing cup high (6 inches above the plastic cup). Pour the silicone in a thin stream, aiming for the side wall of the cup, not directly onto the shell. Let the silicone slowly rise and cover the shell. Pour until the shell is submerged by at least 1/2 inch of silicone.
Step 5: Wait.
Place the cup on a level surface where it will not be disturbed. Wait 2 hours. During this time, you will see bubbles rising to the surface and popping. That is the self-degassing working.
After 2 hours, the surface should be mostly clear of bubbles. Let the silicone cure for a total of 6-12 hours. Overnight is ideal.
Step 6: Demold.
After 12 hours, check the silicone. It should be firm and rubbery. Peel the plastic cup away (or cut it with scissors if stuck). Then carefully stretch the silicone away from the seashell. The shell should pop out easily. If it resists, flex the mold more.
Step 7: Inspect.
Look inside your new mold. You should see every detail of the seashell—the ridges, the curves, the texture. That is a perfect negative replica.
Step 8: Cast.
Mix a small amount of epoxy resin. Pour it into the seashell cavity. Let it cure. Demold your resin seashell. Sand any rough edges. Drill a hole for an earring hook. Congratulations—you just made custom jewelry from a found object.
Total time invested: 10 minutes of active work. The rest is waiting.
Part Nine: Cleaning and Maintenance
Silicone is wonderfully low-maintenance. However, spills happen. The instructions provide a simple cleaning method: soapy water or rubbing alcohol.
- For uncured silicone spills: Wipe immediately with a paper towel. Then clean the surface with rubbing alcohol or warm soapy water. Do not let uncured silicone dry on your counter—it will be difficult to remove.
- For cured silicone drips: Once fully cured, silicone peels off most non-porous surfaces (glass, metal, sealed wood). Just lift an edge and pull.
- For cleaning molds after use: Wash with warm soapy water and a soft sponge. Do not use abrasive scrubbers (they can scratch the mold surface, and scratches transfer to your castings). Air dry.
Storage: Keep unused silicone in its original bottles, tightly sealed, in a cool, dry place away from direct sunlight. Do not store below freezing or above 30°C (86°F). Properly stored, the shelf life exceeds 1 year.
Part Ten: Troubleshooting Common Problems
Even with a beginner-friendly kit, things can go wrong. Here is how to fix them.
Problem: Silicone remained sticky/tacky after 24 hours.
- Cause A: Incorrect mix ratio. Did you measure 1:1 by weight? Did you use volume but not account for density differences? (For this silicone, weight is more accurate than volume.)
- Cause B: Incomplete mixing. Did you stir for the full 5 minutes? Did you scrape the bottom?
- Cause C: Inhibition. Your master object contained sulfur (certain clays, latex, or some plastics). Platinum silicone hates sulfur.
- Solution: For cause A or B, the batch is ruined. Scrape it off and start over. For cause C, seal your master with a barrier coat (clear acrylic spray) before molding.
Problem: Large bubbles in the cured mold.
- Cause: Air trapped under the master or in deep crevices. You poured too fast or poured directly onto the master.
- Solution: For the next attempt, pour slower and from a height. Brush a thin “detail coat” of silicone into crevices first. Or use a vacuum chamber if you have one (though not required for this silicone, it would eliminate all bubbles).
Problem: The mold tore when demolding.
- Cause: The master had sharp undercuts or the mold was too thin. Soft silicone (this is very soft, similar to 10A-15A hardness) is flexible, but sharp edges can still tear thin sections.
- Solution: Make your mold thicker (at least 1/2 inch walls). For masters with extreme undercuts, consider a two-part mold or a brush-on mold with a rigid support shell.
Problem: The silicone did not flow into a tiny detail.
- Cause: The detail was too fine or the silicone’s viscosity was too high (though this silicone is low viscosity).
- Solution: Before pouring the bulk, paint a thin layer of silicone into the detail using a brush. Let it tack up (become slightly thicker), then pour the rest. The brush-on layer will capture the fine detail.
Part Eleven: Comparison – IUMRS RESIN vs. Other Mold Making Kits
| Feature | IUMRS RESIN 140oz | Typical 16oz Starter Kit | Pro Brand (e.g., Smooth-On) |
|---|---|---|---|
| Total volume | 140oz (1 gallon) | 16oz | 64oz typical |
| Price per ounce | Low (best value) | High | Medium-High |
| Platinum cure | Yes | Often tin-cure | Yes |
| Food safe | Yes (when cured) | Usually no | Yes |
| Mix ratio | 1:1 by weight | Varies (often 100:10) | Often 1:1 or 10:1 |
| Working time | 5 minutes | 15-30 minutes | 15-45 minutes |
| Cure time | 6-12 hours | 24 hours | 4-24 hours |
| Vacuum needed | No (self-degassing) | Often yes | Sometimes yes |
| Translucent clear | Yes | Usually opaque | Sometimes clear |
| Beginner-friendly | Very | Moderate | Advanced |
The IUMRS RESIN kit shines for beginners and intermediate users who want large volume at a reasonable price without the need for vacuum equipment. The short 5-minute working time is its main limitation—you need to work quickly. But with preparation, that is manageable.
Part Twelve: Who Is This Kit For? (And Who Should Look Elsewhere)
Perfect for:
- Resin artists who want to create custom molds for unique shapes.
- Soap and candle makers looking to differentiate their products.
- Jewelry designers who cast multiples of found objects.
- Home bakers and chocolatiers who want custom candy molds.
- DIY homeowners making replacement parts or decorative accents.
- Small business owners producing small batches of cast items.
- Beginners eager to learn mold making without expensive equipment.
Not ideal for:
- Industrial-scale production (you would need faster-curing or tin-cure silicone for volume).
- Molds requiring extremely long working times (if you need 30+ minutes to pour a complex multi-part mold, look for a silicone with longer pot life).
- Projects requiring absolute zero bubbles without any effort (while self-degassing is excellent, perfectionists may still want a vacuum chamber).
For the vast majority of home crafters, small studios, and Etsy sellers, this kit is a perfect fit.
Part Thirteen: The IUMRS RESIN Promise – Quality and Support
IUMRS RESIN is an established brand in the resin and mold making space. They stand behind their products.
Customer support: If you have any questions about mixing ratios, curing issues, or application ideas, their support team is responsive. The product listing explicitly invites you to contact them with any problems.
Quality assurance: Each batch of silicone is tested for consistency. You are not getting factory seconds or off-spec material. This is professional-grade silicone sold at consumer-friendly prices.
Risk-free trial: While the prompt does not specify a return policy, IUMRS RESIN generally offers satisfaction guarantees through the marketplace (Amazon, etc.). Check the listing for specific terms.
Part Fourteen: The Verdict – Unleash Your Inner Mold Maker
The IUMRS RESIN 140oz (1 Gallon) Translucent Clear Liquid Silicone Rubber Mold Making Kit is a triumph of product design. It takes a process that was once the domain of industrial professionals and makes it accessible to anyone with a kitchen table and a curious mind.
The highlights:
- Massive 1-gallon volume – dozens of molds from one kit.
- Platinum-cure, food-grade silicone – safe, odorless, non-toxic.
- 1:1 mix ratio – no complicated math.
- No vacuum degassing needed – bubbles disappear on their own.
- Translucent clear – see your master through the mold.
- 5-minute working time, 6-12 hour cure – fast enough for impatient crafters, slow enough to be forgiving.
- Wide application – resin, wax, soap, concrete, chocolate, ice, plaster, and more.
The only drawback: The 5-minute working time is short. You cannot dawdle. But with preparation—having your master secured, your mixing tools ready, your container in place—5 minutes is plenty of time for most hobby pours.
Final thought:
Every crafter reaches a point where commercial molds no longer serve their vision. You want a specific shape. You want to replicate a meaningful object. You want to create something that is uniquely yours.
That is when you stop buying molds. And start making them.
The IUMRS RESIN 1-gallon silicone kit gives you the power to capture any shape, any texture, any object—and turn it into a reusable mold that will serve you for years. Whether you are a resin artist seeking the perfect coaster shape, a soap maker building a brand, or a parent who wants to preserve a child’s handprint in clay, this kit is your gateway.
So go ahead. Find that interesting object on your shelf. Mix up a batch of silicone. Wait a few hours. And then experience the joy of peeling away a perfect, custom-made mold—made by you, for your unique creative vision.
Click below to order the IUMRS RESIN 140oz Mold Making Kit today. Your next masterpiece is just a pour away.