

Let me paint you a picture that’s all too familiar.
It’s Sunday morning. You’re cleaning the bathroom, and your sponge catches on something rough. You lean closer. There it is: a chip in your otherwise pristine white tub. Maybe it’s a nick from a dropped shampoo bottle. Maybe it’s a scratch from a pet’s nail. Maybe it’s a small crack near the drain that’s been slowly growing for months.
Your heart sinks. You know what comes next. A full refinishing project? Replacing the entire tub? Living with an ugly eyesore forever?
Now imagine a different ending. You walk to your storage closet, pull out a small kit, spend twenty minutes prepping, another few minutes mixing, and by the time you finish your morning coffee, that chip is gone. Invisible. Sealed. Protected.
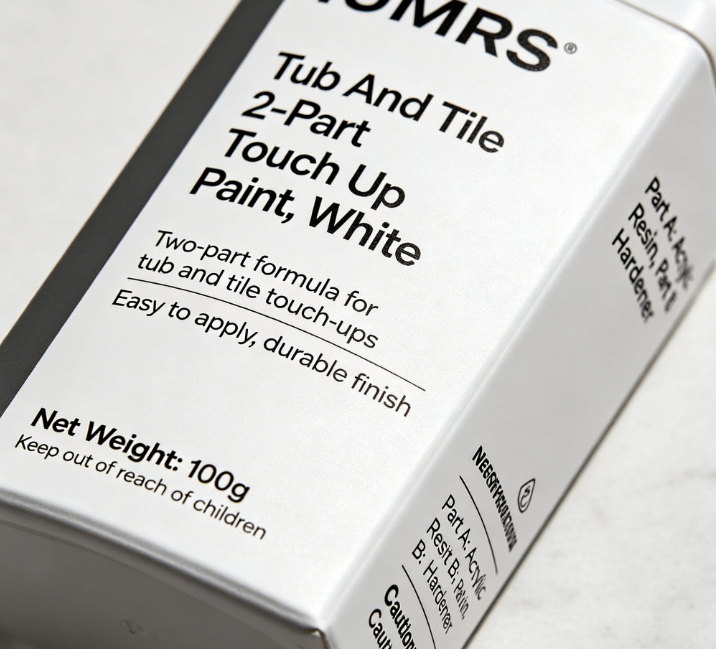
That’s not a fantasy. That’s Tub And Tile 2-Part Touch Up Paint (White) —the professional-grade repair solution that turns catastrophic chips into forgotten memories.
1. The 2-Part Epoxy Acrylic Formula: Real Chemistry for Real Damage

Most touch-up paints are little more than white nail polish with a fancy label. You apply them, they look okay for a week, and then they peel, yellow, or wash away the first time you take a hot shower. Why? Because they’re single-component acrylics that can’t bond properly to slick porcelain, enamel, or ceramic surfaces.
Prepare and paint surface the same day with a fundamentally different approach. The Tub And Tile 2-Part Touch Up Paint uses a professional-grade epoxy acrylic hybrid formula that chemically transforms when you mix the two components. Here’s what that means for you:
- Withstands moisture: Epoxy is naturally waterproof. Once cured, this touch-up paint laughs at steam, splashes, and standing water. No softening, no swelling, no delamination.
- Resists corrosion: Unlike cheap paints that break down over time, the epoxy-acrylic blend creates an inert barrier that protects the underlying substrate from chemical attack—think harsh cleaners, hard water deposits, and even mild acids.
- Toughness that lasts: Two-part systems cure into a thermoset plastic—not a simple dried paint film. You can scrub it, soak it, and abuse it. It holds up.
This isn’t a band-aid. It’s a permanent repair.
2. Proper Mixing: The Simple Secret to Professional Results

Here’s where many DIYers go wrong with two-part products. They assume mixing is optional—or worse, they mix carelessly and end up with a weak, uneven cure. Tub And Tile eliminates the guesswork with clear, foolproof instructions.
For best results, thoroughly mix parts A and B separately before mixing together for 2 minutes.
Let’s break that down:
Step 1 – Mix each part individually: Before you combine anything, stir or shake Part A (the epoxy resin) in its own container until it’s completely uniform. Do the same for Part B (the hardener/catalyst). Why? Because components can settle during storage. Individual mixing ensures you’re working with the correct chemistry from the start.
Step 2 – Combine and mix for 2 full minutes: Pour Part A and Part B together. Then mix continuously, thoroughly, and without shortcuts for two minutes. Scrape the sides. Fold the mixture. Make sure no unmixed streaks remain. This isn’t optional—incomplete mixing leads to soft spots that will fail prematurely.
Step 3 – Use within 6 hours of mixing: Once combined, the chemical reaction begins. You have a 6-hour working window before the mixture becomes too thick to apply. For a small touch-up, you’ll likely finish in minutes. But the generous pot life means you’re not racing against a ticking clock.
Pro tip: Mix only what you need. The kit covers 0.75–1.25 square feet—plenty for multiple chips or one larger damaged area. If you’re repairing several small nicks, you can mix the entire batch and work on them sequentially over several hours.
3. Lightning-Fast Drying: Back to Normal Before Lunch
Waiting for repairs to dry is the second most frustrating part of any DIY project (right after discovering the damage in the first place). You want to use your bathroom. You want to stop looking at that ugly chip. You don’t want to cordon off the tub for days.
Dries to the touch in 20 minutes. Let that sink in. Twenty minutes. That’s less time than a sitcom episode. Less time than scrolling through social media. You can apply the touch-up paint, set a timer, and by the time you’ve cleaned your brushes, the surface is dry enough to handle carefully.
Coverage: Each kit covers between 0.75 and 1.25 square feet. That might sound small, but for touch-up purposes, it’s substantial. A typical chip is the size of a pea—maybe 0.1 square inches. That means one kit can repair dozens of individual chips. Or it can patch a larger scratched area the size of your palm. Or you can use it to touch up the edge of a sink, the corner of a tile, or a hairline crack.
Full cure: While touch-dry in 20 minutes, the repair reaches full hardness and chemical resistance after 24–48 hours. For best results, avoid heavy scrubbing or soaking until then. But light use (hand-washing, quick rinses) is fine after just a few hours.
What does this mean for your weekend? You can discover a chip at 9 AM, prep and mix by 9:30, apply by 9:45, and take a shower by 10:30 the next morning. That’s a repair measured in hours, not days.
4. Safety First: Adequate Ventilation Matters
Two-part epoxy products are powerful. That’s why they work so well. But with power comes responsibility—specifically, the responsibility to use them safely.
Make sure to adequately ventilate area by opening windows and turning on a fan to circulate air.
This isn’t just a suggestion. Epoxy curing releases trace amounts of volatile compounds. While Tub And Tile’s formula is lower in odor than many industrial epoxies, good ventilation is essential for two reasons:
Your comfort: Even low-odor products can cause mild eye, nose, or throat irritation in poorly ventilated spaces. Opening a window and running a bathroom exhaust fan or a small box fan creates airflow that sweeps away any fumes.
Proper curing: Epoxy needs oxygen to cure correctly. Stagnant, humid air can slow the reaction and potentially affect the final finish. Fresh air circulation ensures a fast, complete cure.
Practical tips:
- Open at least one window fully. Two windows (for cross-breeze) is even better.
- Position a fan to blow out of the window, pulling fresh air through the room.
- If your bathroom has an exhaust fan, run it continuously during mixing, application, and for at least an hour after.
- Consider wearing a simple dust mask if you’re particularly sensitive—though it’s not strictly required with adequate ventilation.
These precautions are simple, take seconds to set up, and ensure your repair experience is safe and pleasant.
5. Proper Preparation: The 80% of Success That Most People Skip
Here’s the hard truth that no touch-up paint manufacturer wants to admit: even the best formula in the world will fail if you don’t prepare the surface correctly.
Properly prep surface and read all directions included in kit thoroughly before beginning project.
Tub And Tile doesn’t hide this truth. They put it front and center because they want you to succeed. Let’s walk through the prep steps that make the difference between a repair that lasts a decade and one that fails in a month.
Step 1 – Clean the damaged area thoroughly: Use a non-residue cleaner (rubbing alcohol works well) to remove soap scum, oils, mineral deposits, and any old wax or polish. The surface must be chemically clean. Even a fingerprint can prevent adhesion.
Step 2 – Rough up the surface: Glossy porcelain or enamel is too smooth for any paint to grip. Lightly sand the chipped area and a small margin around it with fine-grit sandpaper (300–400 grit). You’re not trying to remove material—just creating microscopic scratches for mechanical bonding.
Step 3 – Remove dust: Wipe away sanding dust with a tack cloth or a lint-free rag dampened with alcohol. Let dry completely.
Step 4 – Mask off the surrounding area: For precision repairs, use painter’s tape to protect the pristine surface around the chip. This also helps you focus the repair exactly where it’s needed.
Step 5 – Read the instructions one more time: Seriously. Different batches, different temperatures, and different humidity levels can affect application. The included directions are specific to this product. Read them. Follow them.
Skipping prep is like building a house on a swamp. No foundation, no matter how good, will save you. But with proper preparation, even a novice DIYer can achieve an invisible, permanent repair.
Why White? The Universal Fix for Most Bathrooms
White is the most common color for tubs, sinks, tiles, and toilets. It’s timeless, clean, and matches almost any decor. Tub And Tile’s touch-up paint is formulated to match standard white porcelain and enamel finishes across most major brands.
That said, “white” isn’t a single color. Porcelain white can lean slightly warm (cream), cool (blue-white), or neutral. Tub And Tile’s white is a versatile, neutral white that blends beautifully with the vast majority of bathroom fixtures.
If you have an off-white or colored fixture: This product may still work, especially for small chips where the surrounding color dominates. For large repairs on colored surfaces, consult the manufacturer or consider a professional refinishing.
For hairline cracks: White touch-up paint is excellent for filling and sealing hairline cracks in tubs, sinks, and tiles. The epoxy flows into the crack, bonds to both sides, and prevents water from penetrating—stopping the crack from growing.
Real-World Scenarios: When This Kit Saves the Day
Scenario 1: The Dropped Hair Dryer
Maria was getting ready for work when her hair dryer slipped from the counter and banged against the side of the sink. A nickel-sized chip appeared instantly. She panicked—her apartment’s security deposit was at stake. A friend recommended Tub And Tile. She prepped, mixed, and applied during her lunch break. By dinner, the chip was invisible. Her landlord never noticed.
Scenario 2: The Moving Scratch
The Nguyen family just bought their first house. During move-in, the edge of a heavy box scraped along the side of the cast iron tub, leaving a 4-inch scratch. A full refinish would cost $400. Instead, they bought this touch-up kit. The scratch took two thin applications to build up to the surrounding level. Total cost? Under $20. Total time? One hour over two days.
Scenario 3: The Tile Crack
A hairline crack appeared in a bathroom wall tile near the shower head. Water was seeping through, threatening the drywall behind. Replacing the tile meant matching a discontinued color. Instead, the homeowner used Tub And Tile to seal the crack. The white epoxy filled the gap completely, stopped the leak, and blended so well that guests never spotted the repair.
Scenario 4: The DIY Landlord
James owns a duplex. Tenants come and go, and every turnover reveals new chips and nicks in the bathroom fixtures. He keeps a Tub And Tile kit in his toolkit. During each clean-and-repair cycle, he spends 10 minutes touching up damage. His units look freshly refinished without the expense or downtime of professional work.
The Cost Math: Pennies vs. Dollars
Let’s compare:
- Professional bathtub refinishing: $400–$800
- Replacement tub (materials only): $300–$1,500
- Replacement tile work: $500–$2,000
- Full bathroom remodel: $6,000–$15,000
- Tub And Tile 2-Part Touch Up Paint: Typically $15–$30
Even if you buy four kits over the life of your bathroom, you’re spending less than $100. That’s 1/5th the cost of the cheapest professional repair. And you get to do it on your schedule, in your home, without waiting for an appointment.
This isn’t just a good deal. It’s financial common sense.
What This Kit Does NOT Do (Honest Expectations)
Let’s be clear about limitations, because no product is magic.
This is for small repairs, not full refinishing. If your entire tub is yellowed, deeply scratched, or covered in dozens of chips, you need a full refinishing kit (like the JUNGARIAN product mentioned elsewhere). This touch-up paint is for spot repairs.
Matching isn’t always perfect. On very old, yellowed white porcelain, the bright white touch-up paint may stand out slightly. Feathering the edges (blending thin applications) helps, but perfection isn’t guaranteed.
Not for structural cracks. If your tub or tile is cracked all the way through—not just the surface—you need a professional assessment. This paint seals the surface but won’t fix underlying structural issues.
With those honest caveats, for 95% of household chips, nicks, and scratches, this kit is the perfect solution.
The Bottom Line: Stop Living With Ugly Chips
Every day you ignore that chip, it gets a little worse. Water seeps in. The edges lift. What started as a small cosmetic issue becomes a functional problem.
Tub And Tile 2-Part Touch Up Paint (White) stops that progression cold:
- Tough 2-part epoxy acrylic – withstands moisture and corrosion
- Proper mixing protocol – clear instructions for foolproof results
- 20-minute dry time – back to using your bathroom today
- Covers 0.75–1.25 sq. ft. – enough for dozens of small repairs
- Ventilation guidance – safe and responsible usage
- Prep instructions – the secret to professional-quality repairs
Don’t remodel. Don’t replace. Don’t ignore.
Touch it up. One kit. One hour. One less thing on your to-do list.
Order Tub And Tile today. Your bathroom is too beautiful for chips.